High-precision segmentation model on mobile devices

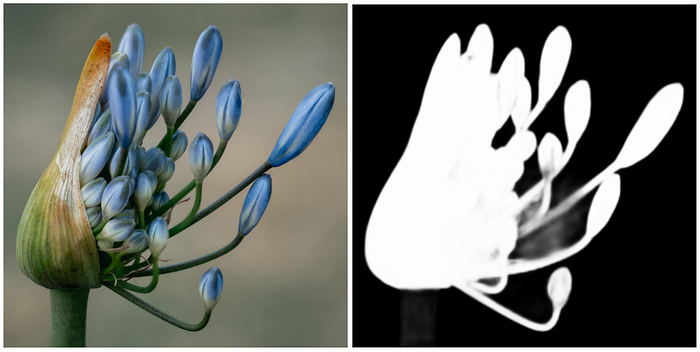
U2Net is a machine learning model that separates prominent objects in images from the background.
There are various segmentation models that correspond to specific objects such as people, but this U2Net has a wide range of uses because it segments the most prominent object in the image.
It is used in various apps with high accuracy.
A model originally written in python.
By converting this to CoreML, it can be used on-device on iOS.
It can be done with just an iPhone chip.
Moreover, it is quite fast.
The accuracy is the same as the original model.
Converted model
It’s on CoreML Models on GitHub.
Google Colab notebook demo of conversion code
Original project

paper
Applications that use U2Net
Version
There is a 176.3MB version and a 4.6MB lightweight version.
The following shows the conversion procedure for the 176.3MB version,
I also commented out several places to change in the case of the lightweight version.
Conversion procedure
Clone the original project.
git clone https://github.com/xuebinqin/U-2-Net.gitInstall CoreML Tools.
pip install coremltoolsMove to the project directory.
cd U-2-Net/Import the required modules.
from model import U2NET
# For the lightweight version is:
# from model import U2NETP
import coremltools as ct
from coremltools.proto
import FeatureTypes_pb2 as ft
import torch
import os
from PIL import Image
from torchvision import transforms
Get pre-trained weights. You can get it from the Google Drive link of the
original project .
176.3MB
4.7 MB
for portraits
Initialize the U2Net model.
net = U2NET(3,1)
# Lightweight Version:
# net = U2NETP(3,1)
device = torch.device('cpu')

###Path To Model Directory.
model_dir = os.path.join(os.getcwd(), '/content/drive/MyDrive', "u2net" + '.pth')
# Lightweight Version: u2netp.pth

net.load_state_dict(torch.load(model_dir, map_location=device))
net.cpu()
net.eval()
Make a dummy input. The actual image is fine.
example_input = torch.rand(1,3,320,320)conversion.
Set the input bias to the color channel and scale for the model.
(Refered to the following issue in the conversion process.)
traced_model = torch.jit.trace(net, example_input)
model = ct.convert(traced_model, inputs=[ct.ImageType(name="input", shape=example_input.shape,bias=[-0.485/0.229,-0.456/0.224,-0.406/0.225],scale=1.0/255.0/0.226)])
Add model metadata.
model.short_description = "U2-Net: Going Deeper with Nested U-Structure for Salient Object Detection"
model.license = "Apache 2.0"
model.author = "Qin, Xuebin and Zhang, Zichen and Huang, Chenyang and Dehghan, Masood and Zaiane, Osmar and Jagersand, Martin"
Add a new activation layer to the end of the
model and turn the output of the CoreML model into a grayscale image.
#Add activation layer.spec = model.get_spec()
spec_layers = getattr(spec, spec.WhichOneof("Type")).layers
output_layers = [] for layer in spec_layers:
    if layer.name[:2] == "25":
        print("name: %s input: %s output: %s" % (layer.name, layer.input, layer.output))
        output_layers.append(layer)
new_layers = []
layernum = 0;
for layer in output_layers:
     new_layer = spec_layers.add()
     new_layer.name = 'out_p'+str(layernum)
     new_layers.append('out_p'+str(layernum))
     new_layer.activation.linear.alpha=255
     new_layer.activation.linear.beta=0
     new_layer.input.append('var_'+layer.name)
     new_layer.output.append('out_p'+str(layernum))
     output_description = next(x for x in spec.description.output if x.name==output_layers[layernum].output[0])
     output_description.name = new_layer.name
     layernum = layernum + 1# Make output GrayScale image.

for output in spec.description.output:
    if output.name not in new_layers:
        continue
    if output.type.WhichOneof('Type') != 'multiArrayType':
        raise ValueError("%s is not a multiarray type" % output.name)
    output.type.imageType.colorSpace = ft.ImageFeatureType.ColorSpace.Value('GRAYSCALE')
    output.type.imageType.width = 320
    output.type.imageType.height = 320# save updated model.

updated_model = ct.models.MLModel(spec) updated_model.save("u2net.mlmodel")
Up to this point, you can get the U2Net model in CoreML format.
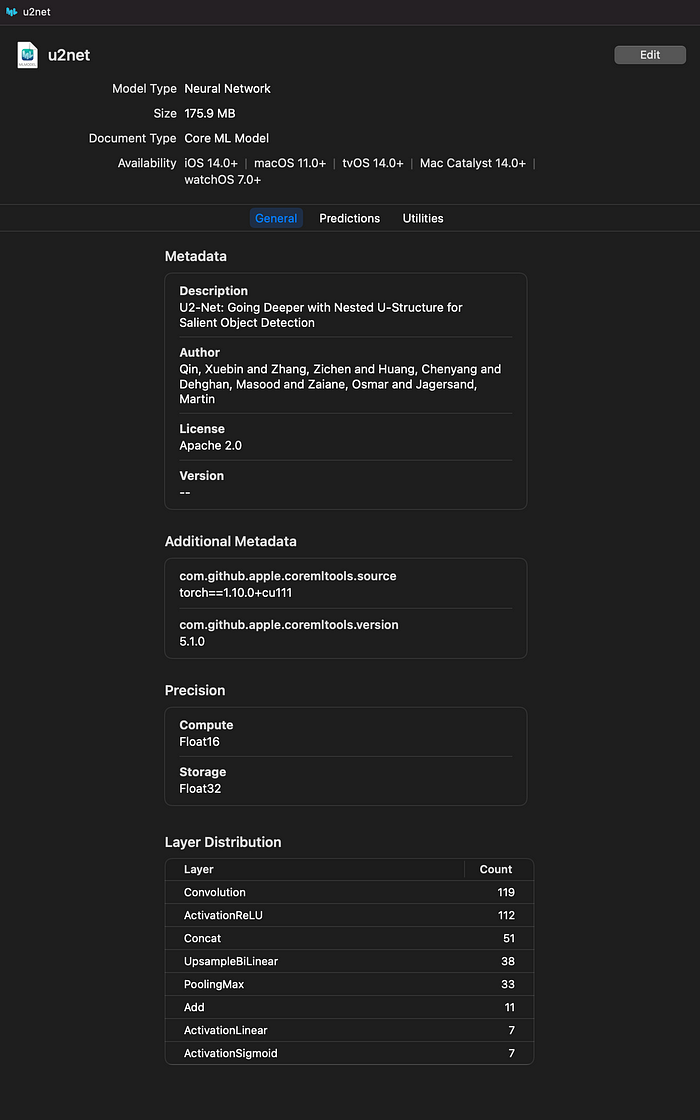
When you open the model, it will be displayed as follows.

The output has 7 channels up to out_p6.
Out_p1 can be used as a mask image.

Use the model in your Xcode project
There are two options for using it in a project.
1. When using the CoreML framework
2. When using Vision
This is recommended because it is convenient for automatic adjustment of the input image size.
In both cases, the input and output are 320 * 320 CVPixelBuffer.

🐣
I’m a freelance engineer.
Work consultation
Please feel free to contact us with a brief development description.
rockyshikoku@gmail.com
I am making an app that uses Core ML and ARKit.
We send machine learning / AR related information.
